WEBCON users and groups list
Section contains a list of users and groups available in WEBCON. The configuration window is divided into two tabs: WEBCON users and WEBCON groups. Configuration of WEBCON users and groups is also possible from WEBCON Portal and in both cases requires administrative privileges. The functionality is available for Standalone installations and in the WEBCONAPPS-SaaS environment.
To learn more about WEBCON groups in Standalone installations, read the ARTICLE available on our technical blog.
WEBCON users
The tab lists all locally created WEBCON users. By using the ![]() and
and ![]() buttons available on the right, you can add or remove users from the list. To edit information regarding the users already available on the list, press the ellipsis button (
buttons available on the right, you can add or remove users from the list. To edit information regarding the users already available on the list, press the ellipsis button (![]() ).
).
You can search the list by using keywords, as well as sort information by BPS ID, name (usually first and second name), e-mail, source, and last synchronization date.
Furthermore, you can narrow down the list of users or groups to display only synchronized items (the Synchronized checkbox) or items awaiting synchronization (the Waiting for synchronization button).
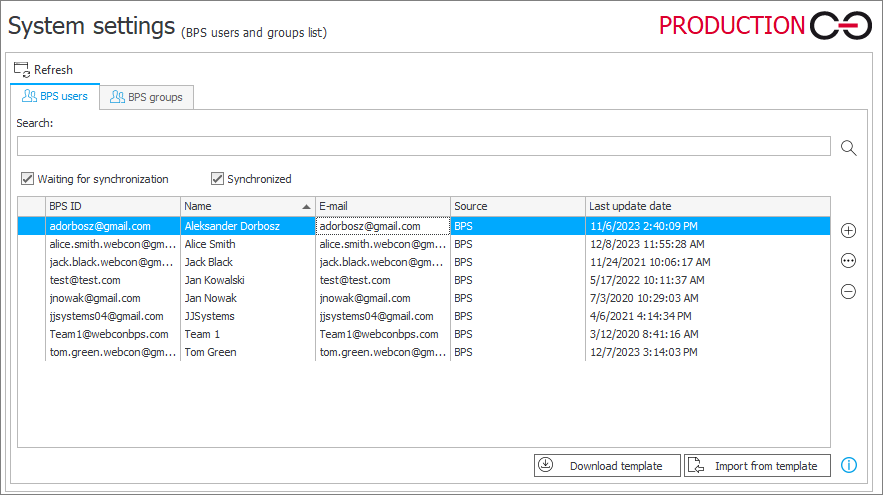
Download template
Clicking the button starts downloading the BpsUsers template in the .xlsx format. The template includes predefined column headers with WEBCON user data.
Import form template
The button allows you to import users from a template. The template file must have values entered in the following columns: Email, Name, and BpsId (UPN format). The BpsId column cannot contain the following characters: "", "%", "&", "*", "+", "/", "=", "?", "{", "}", "|", "<", ">", "(", ")", ";", ":", ",", "[", "]", """, "#". Data in the remaining columns is optional.
An icon can be placed in the Picture column as an image file (.jpeg, .bmp, .png, or .gif format) encoded in the Base64 text format with a prefix (Data URL), e.g. data:image/png;base64,/AAAAAAAAAA=. It is recommended to use files smaller than 10 KB with a resolution of 96 x 96 px.
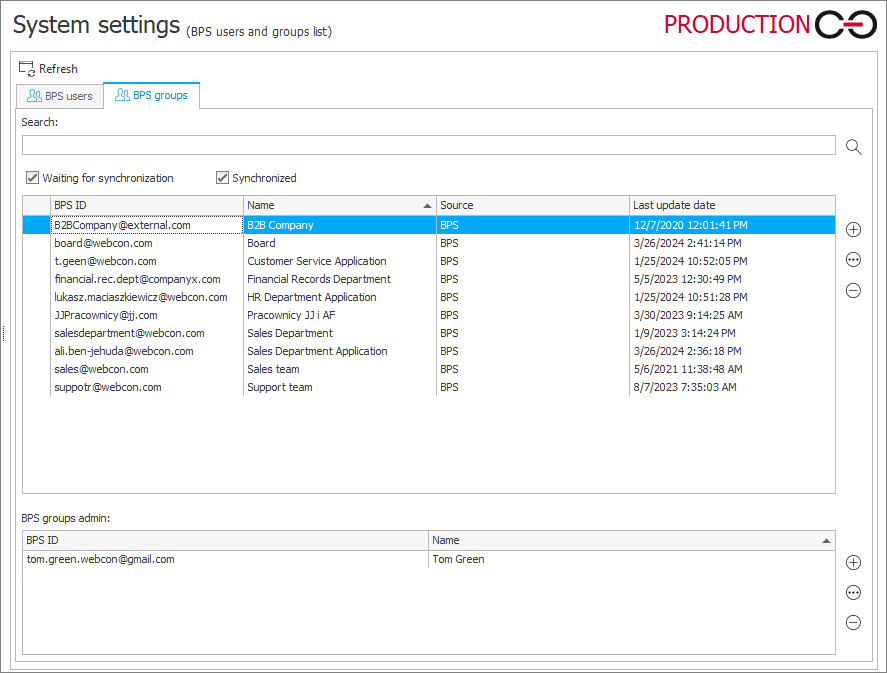
WEBCON groups
WEBCON groups are local groups of WEBCON users whose data is retrieved from Active Directory (AD), Microsoft Entra ID or who are external users. The division of users into groups streamlines the management of their privileges, the assignment and delegation of tasks, as well as facilitates the exchange of information, e.g. in case of absence.
The tab contains information about all locally available WEBCON groups. Similarly to the WEBCON users list, the buttons located on the right allow you to add (![]() ), remove (
), remove (![]() ), or edit (
), or edit (![]() ) the groups.
) the groups.
Adding a WEBCON group
After pressing Add (![]() ), the system displays a window where you can configure a new group.
), the system displays a window where you can configure a new group.

Here, you need to enter the Group identifier (BPS ID) in UPN format and the Displayed name of the group. The Members and Group owners fields enable you to add group members and specify its owner, respectively.
Managing WEBCON groups
Administrators can leverage WEBCON groups within their applications in various ways, streamlining configuration processes and increasing efficiency.
To learn more about managing WEBCON groups, read the ARTICLE on our technical blog.
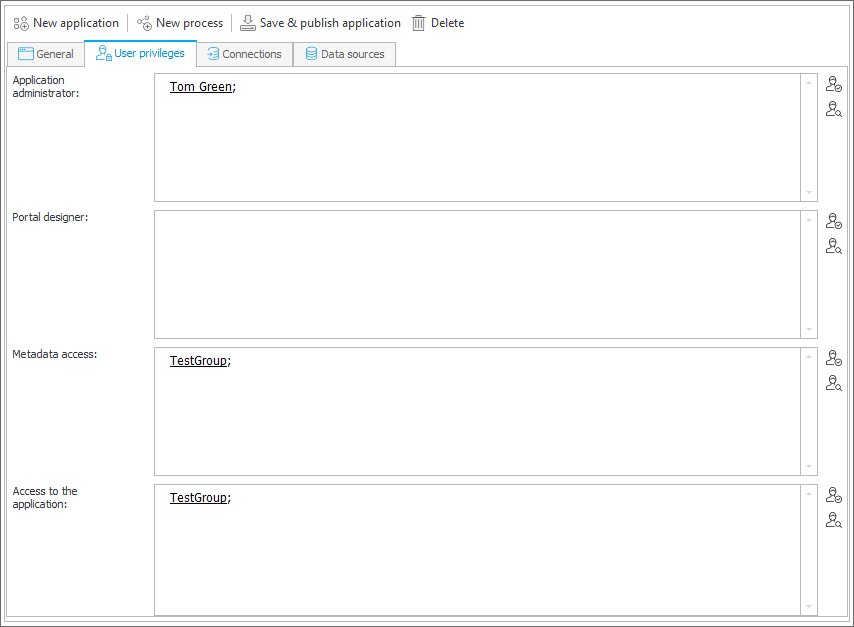
Granting privileges
You can grant privileges (e.g. within an application) directly to WEBCON groups. This way each member of such a group automatically obtains the privileges assigned to it. Note that if an individual is removed from the group, they will also lose the privileges to the group.
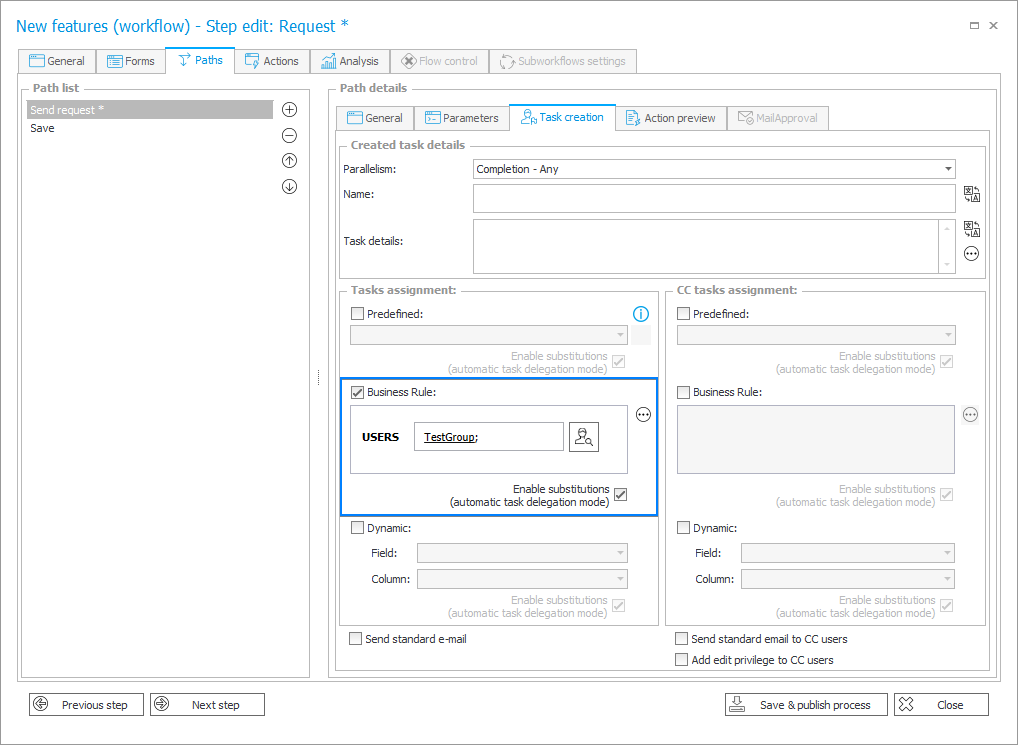
Assigning tasks
Designer Studio allows you to assign tasks to a created user group. This solution is particularly useful when there are frequent changes in staffing and a task assigned to an individual would necessitate modifications in workflow configuration.
To learn more about assigning tasks to groups, read the ARTICLE on our technical blog.
Action related to WEBCON groups
You can also manage WEBCON groups through dedicated actions available in Designer Studio. To access them, once you have created an automation and added an action block, navigate to the WEBCON users and groups heading.